Anodizing is among the most common post-processing operations performed on aluminum parts. It is an electrochemical process that involves immersing an aluminum part in a series of tanks, converting the aluminum surface into a durable and corrosion-resistant finish.
To determine whether anodizing is the right choice for a specific part, product designers must first understand how it affects aluminum’s strength, thickness, color, and thermal conductivity.
This article presents answers to five frequently asked questions about anodized aluminum. If you’re looking to implement anodizing in your machined product, this article is for you!
1) How does Anodizing Work?
The anodizing process involves dipping and treating a clean aluminum part into an electrolyte chemical bath. This chemical bath is typically made of sulfuric or chromic acid (an electrically conductive solution).
Next, a direct electric current is applied to this chemical bath, creating a positive electric charge on the aluminum part and a negative charge in the electrolyte plates. The resulting electrochemical reaction creates pores on the surface of the part. These pores bond with the negatively charged O₂ ions in the electrolyte to form a cellular oxide layer (aluminum oxide) on the component.
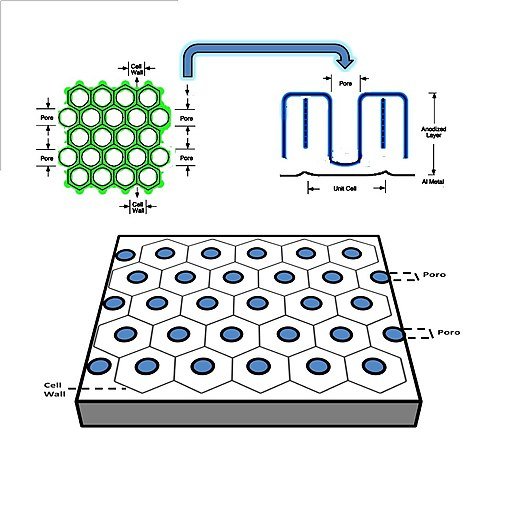
Image Source: Vicente Neto, CC BY 4.0, via Wikimedia Commons
This aluminum oxide layer is more durable and corrosion-resistant than the underlying aluminum substrate. However, almost every aluminum part naturally creates an aluminum oxide layer when exposed to the atmosphere. So what makes the anodizing process unique, and why should you go through the hassle of achieving something that pretty much occurs naturally?
2) Why Anodize Aluminum Parts?
When you expose a regular aluminum part to the atmosphere, an aluminum oxide layer is formed over the part’s surface. However, this layer is usually very thin and can easily wear off, especially when you scratch it or use it in areas with polluted air.
However, unlike regular aluminum, an anodized aluminum part has its aluminum oxide deep within the aluminum substrate. For instance, the pores (and cellular oxide layer) formed in the electrochemical reaction can reach up to 25 microns. As a result, you’d have an aluminum component that is corrosion-resistant, scratch-resistant, and can withstand almost any chemical attack.
3) Does Anodizing Make Aluminum Parts Stronger?
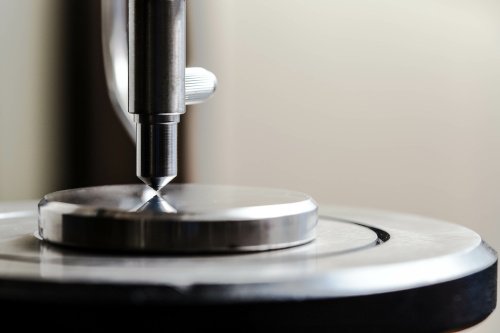
Material hardness tester
Anodizing doesn’t make an aluminum component stronger or weaker. Instead, it increases aluminum’s hardnessㅡwhich describes the resistance of the aluminum component to surface indentation, scratching, or abrasion. For instance, an anodized aluminum component can be three times harder than the original aluminum alloy.
In addition, anodized aluminum parts are typically lighter than other metals like copper and stainless steel. This unique characteristic makes them ideal for aerospace applications that require lightweight metals.
4) Does Anodizing Improve Thermal Conductivity of Aluminum?
Thermal conductivity describes the ability of a material to transfer or conduct heat. This ability increases with the amount of heat flow, material thickness, and surface area of the material.
Because anodizing forms an additional oxide layer on the surface of an aluminum component, you’d agree that it increases the thickness and surface area of the component. As a result, the anodized aluminum will have improved thermal conductivity than an unfinished aluminum component. This makes anodized aluminum parts ideal for today’s heat sink applications found in electronics and other thermal systems.
5) What are the Types of Anodizing?
Anodizing is commonly classified according to the MIL-A-8625 standard into three types:
- Type I Anodizing
- Type II Anodizing
- Type III Anodizing
The Type I anodizing process, also called chromic acid anodizing, uses a chromic acid chemical bath to create coatings (or oxide layer) on the aluminum surface. It produces a thin coating (up to 2.5 microns) and is ideal in applications where you require minimal corrosion protection and paint adhesion.
The Type II anodizing process uses a sulfuric acid chemical bath to create an oxide layer on the aluminum component. This anodizing type produces an oxide layer as thick as 25 microns, making them more corrosion resistant than Type I anodized aluminum parts. In addition, because they have thicker oxide layers (and pores), they are better at retaining dyes and coloring than “Type I” anodized parts.
The Type III anodizing process, also called hard-coat anodizing, produces oxide layers thicker than 25 microns. It uses sulfuric acid as a chemical bath, like the Type II anodizing. However, the electric current in this process is made to flow for longer periods than in Type II anodizing. This allows them to produce thicker layers and makes them more corrosion-resistant than Type I and Type II anodized parts.
6) The Cost of Anodizing Aluminum At Home
If you’re looking for a way to protect your aluminum products and save money, anodizing is an excellent choice. This process is far superior to painting and can be done in your own home for a fraction of the cost.
The actual cost associated with the process will vary depending on where you live and the part you want anodized. The larger the part and the harder the coating, the more it will cost. However, it is still cheaper and faster to do it at home.
When anodizing aluminum at scale, the important thing to keep in mind is to set up your equipment in a well-ventilated location. Also, buying your items in bulk will help you save money.
Procuring sulfuric acid can prove to be challenging depending on where you live, but you can usually find it at fire extinguisher supply stores or scientific/chemical supply companies. However, buying sulfuric acid in bulk may require a license or permit, so make sure that you check with the local authorities first.
7) Materials Needed To Anodize Aluminum
Most materials needed to anodize aluminum are basic and easy to find. They are also relatively inexpensive. If you want to do this regularly at home, you might want to set up your very own anodizing station.
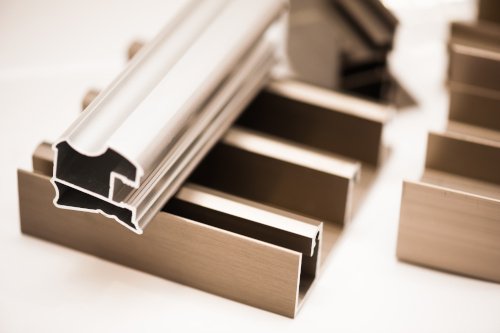
Here are the items you’ll need:
- Distilled water
- Tanks and containers to hold liquids during the process
- Sulfuric acid
- A cathode
- Acid neutralizer
- Degreaser
- Aluminum wire or titanium wire
- Lye
- Dye (any color you desire)
- A battery (or any other power source)
You will also want to find a well-ventilated spot to set up the anodizing station; make sure to wear goggles, gloves, and a respirator.
In addition to the items we listed, you will also want to buy a few optional things, which will make the job easier, in our opinion and experience. These include:
- Ping pong balls (you can put this into the tank to prevent the build-up of acid mist)
- An agitator
- Cheap kettle for the dye
- A kitchen thermometer to check the temperatures
8) Anodizing Aluminum – The Basic Steps
Once you have collected everything we’ve listed above, all you need to do is follow the steps below.
1 – Use steel wool or even a mildly abrasive dishwashing pad to scrub the surface of the aluminum you are about to anodize. This will help to remove any machining marks from the metal.
2 – The next step is to put on all your safety equipment, i.e., gloves, goggles, etc.
3- Clean the part using a degreaser and then wash it with distilled water.
4 – Prepare the lye solution, usually 10 to 20%. Add around four tablespoons of lye to a gallon of water. Mix this solution with pure distilled water, and place the parts in it. Wear rubber gloves, and wait for a few minutes while the solution soaks into the aluminum. You should see bubbles rise to indicate that the surface of the aluminum is being scoured. This shouldn’t take more than 5 minutes.
5 – Remove the part from the lye bath and wash it down with distilled water. Make sure that the part is clean. If you see that water beads off the surface, wash it down a few more times.
6 – You then want to rack the part by hooking it up to aluminum or titanium wire. It should have a solid connection and keep in mind that there will be an unanodized mark where the wire was in contact with the part. So, choose the location wisely.
7– The next step is to create a bath by pouring sulfuric acid into distilled water. You do this by mixing 1 part acid with three parts distilled water. However, regardless of the ambient temperature, it is essential to ensure that the bath is at 70 degrees Fahrenheit. If it goes above this temperature or below 65F, it will ruin the process, and the results will be disappointing.
8 – You will then add the cathode to the tank, but make sure it does not touch the part you want to anodize. The parts you wish to anodize should be suspended in the tank, ensuring that they don’t touch anything. You then add a small heater and a thermometer. The surface of the bath can also be covered with ping pong balls.
9 – Don’t start the process until the temperature in the bath is 70 degrees.
10 – Next, hook up your power supply and connect to the positive terminal of the battery or the supply. The negative is then hooked up to the cathode. Here is where you need to be careful because the bath will start emitting dangerous fumes.
11 – You will want to set the amperage based on the surface area you want anodized. If you want a hard surface, set it to 0.03 amps per square inch; if you want something softer, which will soak up the dye, dial it to 0.02 amps.
12 – We initially recommend starting at 16 volts. Some online calculators can help you with this, but at home, 16 volts is pretty good. However, the important thing here is to keep an eye on the temperature in the tank as the process progresses. The temperature often increases during the process, so you can’t leave it alone.
13 – Once the anodizing process gets going, you can start heating the dyes. Most colors will work fine at 140° F, but you may want to cool some colors down. All brands of paint are a little different and will merit some experimentation.
14 – You then prepare a distilled water tank and the other with an acid neutralizer.
15 – Once completed, turn off the power, remove the parts from the tank, and then dip them into distilled water for 15 seconds. Then rinse in the neutralizer tank for around 5 minutes. You will want to do a second round of rinsing in the neutralizer for 5 minutes. Then again, with distilled water before dunking the parts in the dye. The parts will instantly absorb color, but you will have to leave them in for around 15 minutes, depending on the intensity you desire.
16 – Once the dyeing process has been completed, you need to boil the parts for 15 minutes. This will help to harden the dye, ensuring a hard seal.
Aluminum Anodized Finish: Gensun Can Help
Now that you know at least something about anodizing finishes, you’d agree that anodized aluminum parts offer several advantages over regular aluminum parts. However, the anodizing process isn’t as simple as it seems: it requires special technologies and expertise.
Gensun Precision Machining is a leading provider of high-quality manufacturing services across Asia. Not only do we fabricate products accurately using our state-of-the-art CNC machining technologies, but we also provide a broad range of surface finishing services, including aluminum anodizing finishes.
Learn more about our surface finishing services.
Note: This article was originally published in April 2021, and was updated in May 2022

